Wednesday, July 27, 2011

DIY #4

Hey guys!!! I'm back with my next DIY! This is a Lanvin knock-off necklace that could be made with several different ribbons to create different styles for different seasons. I made a more summery version to show you.

Supplies:
-Pearls
- Needle and Thread
- Ribbon ( I used grosgrain, but a velvet or an ivory bark would work too for a different look)


1.) Cut 2 1/2 yards of your ribbon. Pinch the ribbon a fourth of the way down. Thread your needle through the middle of the fold.

2.)Thread a pearl on top of the fold, then pinch the ribbon again, thread the needle through the middle and add another pearl. 

3.) Repeat step 2 until you reach the desired length. Mine was 13 inches long (not including the not folded part of the necklace.)

4.) Thread the needle back through all of the folds and pearls for extra hold. Then knot the thread. Then tie a loose knot at each end of the ribbon.
VoilĂ !!! A Lanvin necklace for under $10!


XOXOXOXXOXOXOX
Mia <3


Source: http://www.lovemaegan.com

Thursday, July 21, 2011

DIY #3

Hi everyone! Yes, I am back already (; I did another DIY Project today that I am very happy to show you guys. It was inspired by the Giles and Brothers Hex Collection. (They have awesome jewelry but it's pretty expensive...) So this is a less expensive DIY version.

Supplies:
- 3 yards of twine
- 18 hex nuts
- clipboard
(I'm not adding pictures of the supplies because they're pretty self-explanatory)

1.) Cut three strands of twine that are one yard long. Tie them together with a knot about 3 inches from the top and attach to the clipboard.
2.) Braid for about 1 1/2 inches.


3.) Now keep braiding but string a hex nut through the strand before bringing it towards the middle.
4.) Keep adding hex nuts while you braid until all 18 hex nuts are threaded in.
5.) Now go back to braiding without the hex nuts until you an wrap it around your wrist.
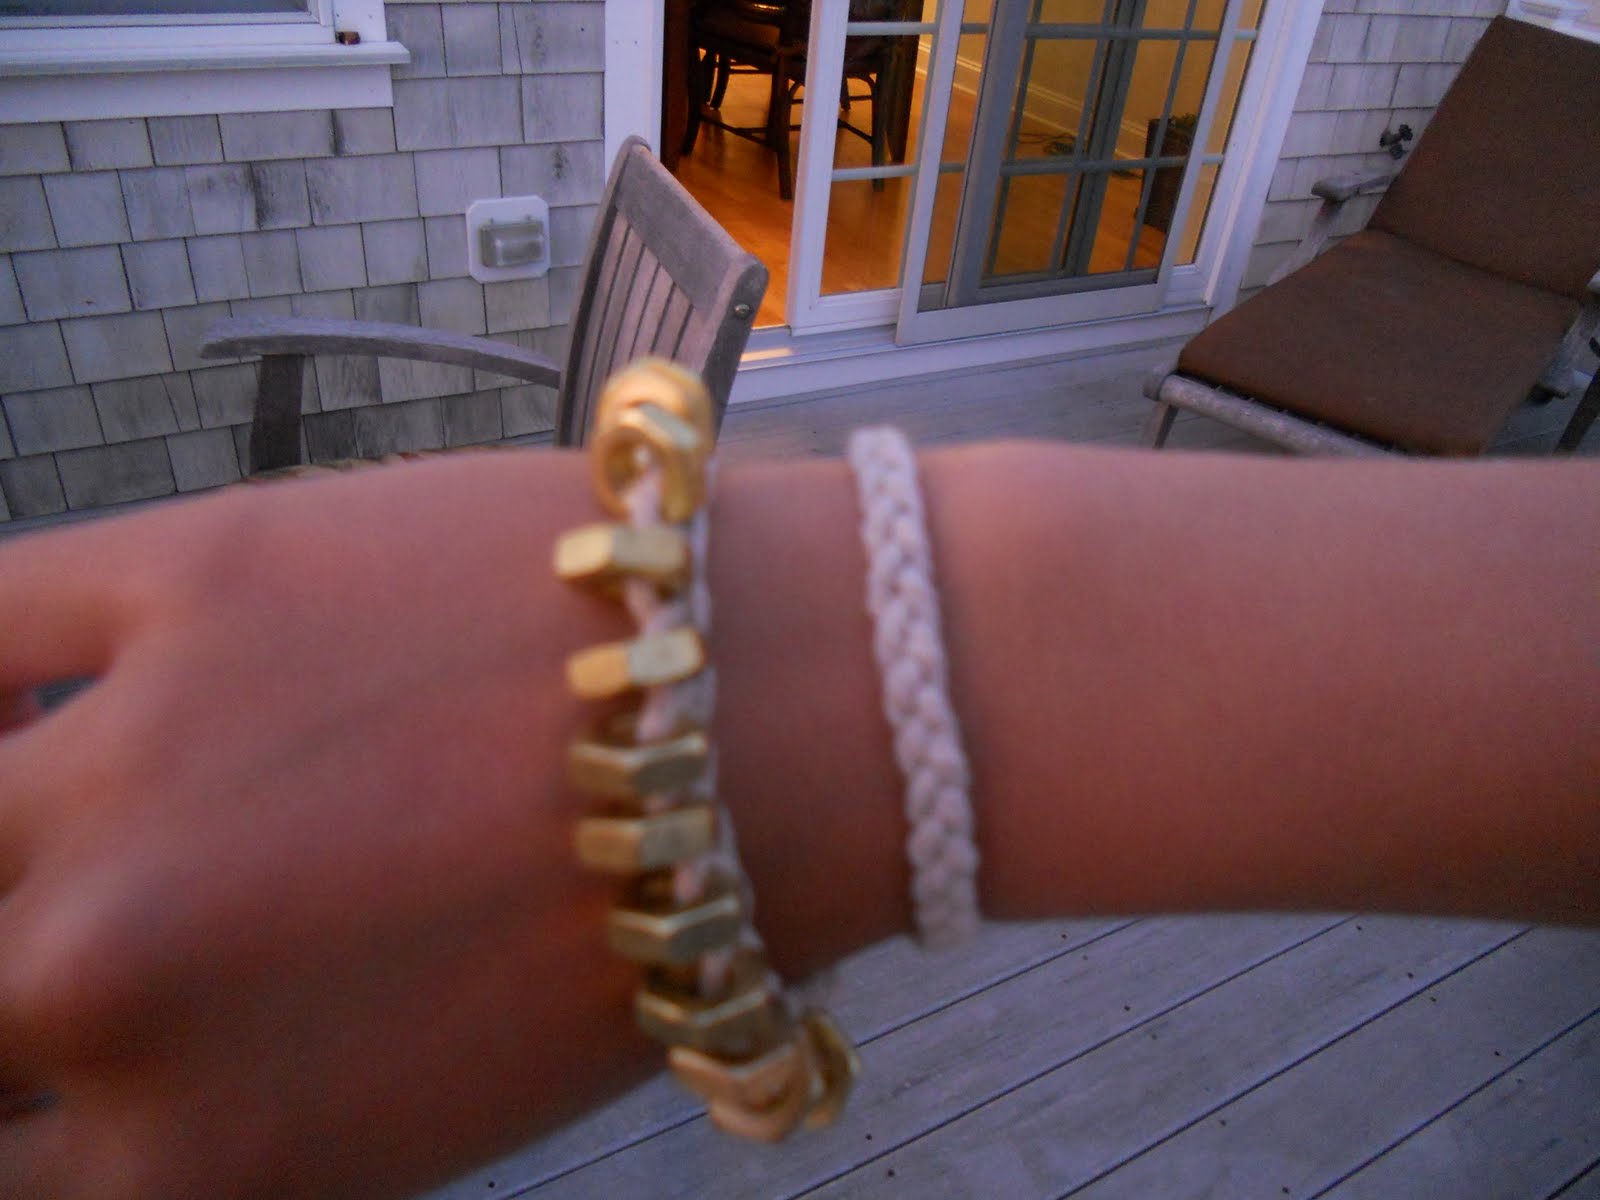
6.) Tie a knot. Then leave about two to three inches before cutting off the excess twine. And voila!
VARIATIONS:

I had extra supplies so I started thinking of different versions of this bracelet. 

1.) One variation was braiding about seven inches after adding all the hex nuts so that it was like a wrap bracelet.

2.) The other variation was instead of adding a hex nut every time you brought a string to the middle, you only added a hex nut whenever you brought the far left strand towards the middle. So all the hex nuts ended up on the left side of the bracelet. 

Tip: You can mix and match the variations to make all sorts of different bracelets. You could do the wrap bracelet version with the double strand of hex nuts OR the single strand of hex nuts. Dido with the single bracelet variation.


xoxoxxoxoxoxoxox
Mia


Source:honestlywtf.com

DIY #2

Hey y'all! So I have made my second DIY Project and I'm going to do a tutorial for this one because it's super easy, but cute!!! It's this little bird nest pendant! It doesn't sound as cute as it actually is... Haha just bear with me and read on (:


Supplies; - wire 
-chain
-glass beads
-necklace clasp
-pliers


 1.) Choose a couple glass beads of your choice, you can pick any amount you want, depending on the size. I chose three beads. String them through the wire to form a circular shape.


2.) Start wrapping the wire around all of the beads. Keep doing so to create a bird nest shape. TIP: After every  5 or so wrap arounds, string the wire through through all of the wrap arounds to keep them tight. When you have created the desired shape, make a loop with the wire at the top of the nest.

3.) Cut the chain to the desired length. My chain was 21 1/2 inches long. Then string it through the loop at the top of your nest.

4.) Lastly, attack your clasp to the chain. If you find it difficult, try adding jump rings, but they're not necessary. I did fine without them.

Voila! A cute and easy pendant!

My sister insisted on modeling for me....


I hope this was clear enough for you to follow! I'll be back soon with more DIY Projects!!! Again, sorry about the blurry pictures, my camera's still broken... See you soon!!!
xoxoxoxoxox
Mia


Source: http://www.sarahortega.com

Wednesday, July 20, 2011

Polyvore Blogger Awards: Calvintage; Best Personal Style

Polyvore....

Ok.... So I didn't realize till now that my Polyvore sets were being downloaded straight to my blog.... And all of the items I imported.... so sorry about that.... I didn't know that was going on, and I'm not quite sure how to stop that from happening. If you are a fellow Polyvor-er and know how to stop that, COMMENT PLEASE!!! Anyway, I hope you enjoy my sets at least (: That's why I haven't been posting here... But that's going to stop now (: I'll be back soon with my second DIY!
xoxoxoxoxoxoxoxox
mia

Project DIY #1

Hey guys! I know I haven't blogged in FOREVER, but it was for a reason. Two actually. I, not so recently,  graduated eighth grade, and I made my dress! And that inspired me into starting Project DIY. Over the course of the summer I'm going to do 100 DIY projects! And of course I'm going to blog about them, and maybe give a tutorial? So I hope you guys enjoy this little project, hopefully I will stay truthful and actually do all 100! As my first DIY I find it appropriate to have it be my graduation dress! Obviously I'm not going to give a tutorial on this one! But I can give a quick explanation of it. It's made of silk eyelet dupioni, in an off white color. And because it was eyelet (which means it has those little holes in it on purpose :) ) i had to line it, so it was lined in a chinese silk in a pale pink. I'm sorry I don't have a picture of the back or a close-up of the top, but I'll do my best to explain it. Hmmm where do I begin.... I guess I'll start at the top. It had spaghetti straps and a sweet-heart neckline, which had a ruffle on one side. Below that, it kind of had a wrap dress sort of feel. AH! I don't know how to describe it! Basically, for my fellow sewers out there, it was made up of large darts and pleats. Then it had a gathered skirt. Then in the back, the top had these bunny ears almost (: That were tied in a bow. So I hope that sounded good.... I'll add one of the pictures my mom took to make it a little more clear. I hope this is the start of a great project!
PS The shoes are Franco Sarto
and the pearls are my moms.
xoxoxoxox

mia